Recipe for a delicious dish
Hello, my friends. Today we will learn how to cook the dish show bellow, in Python, using PyQt5.
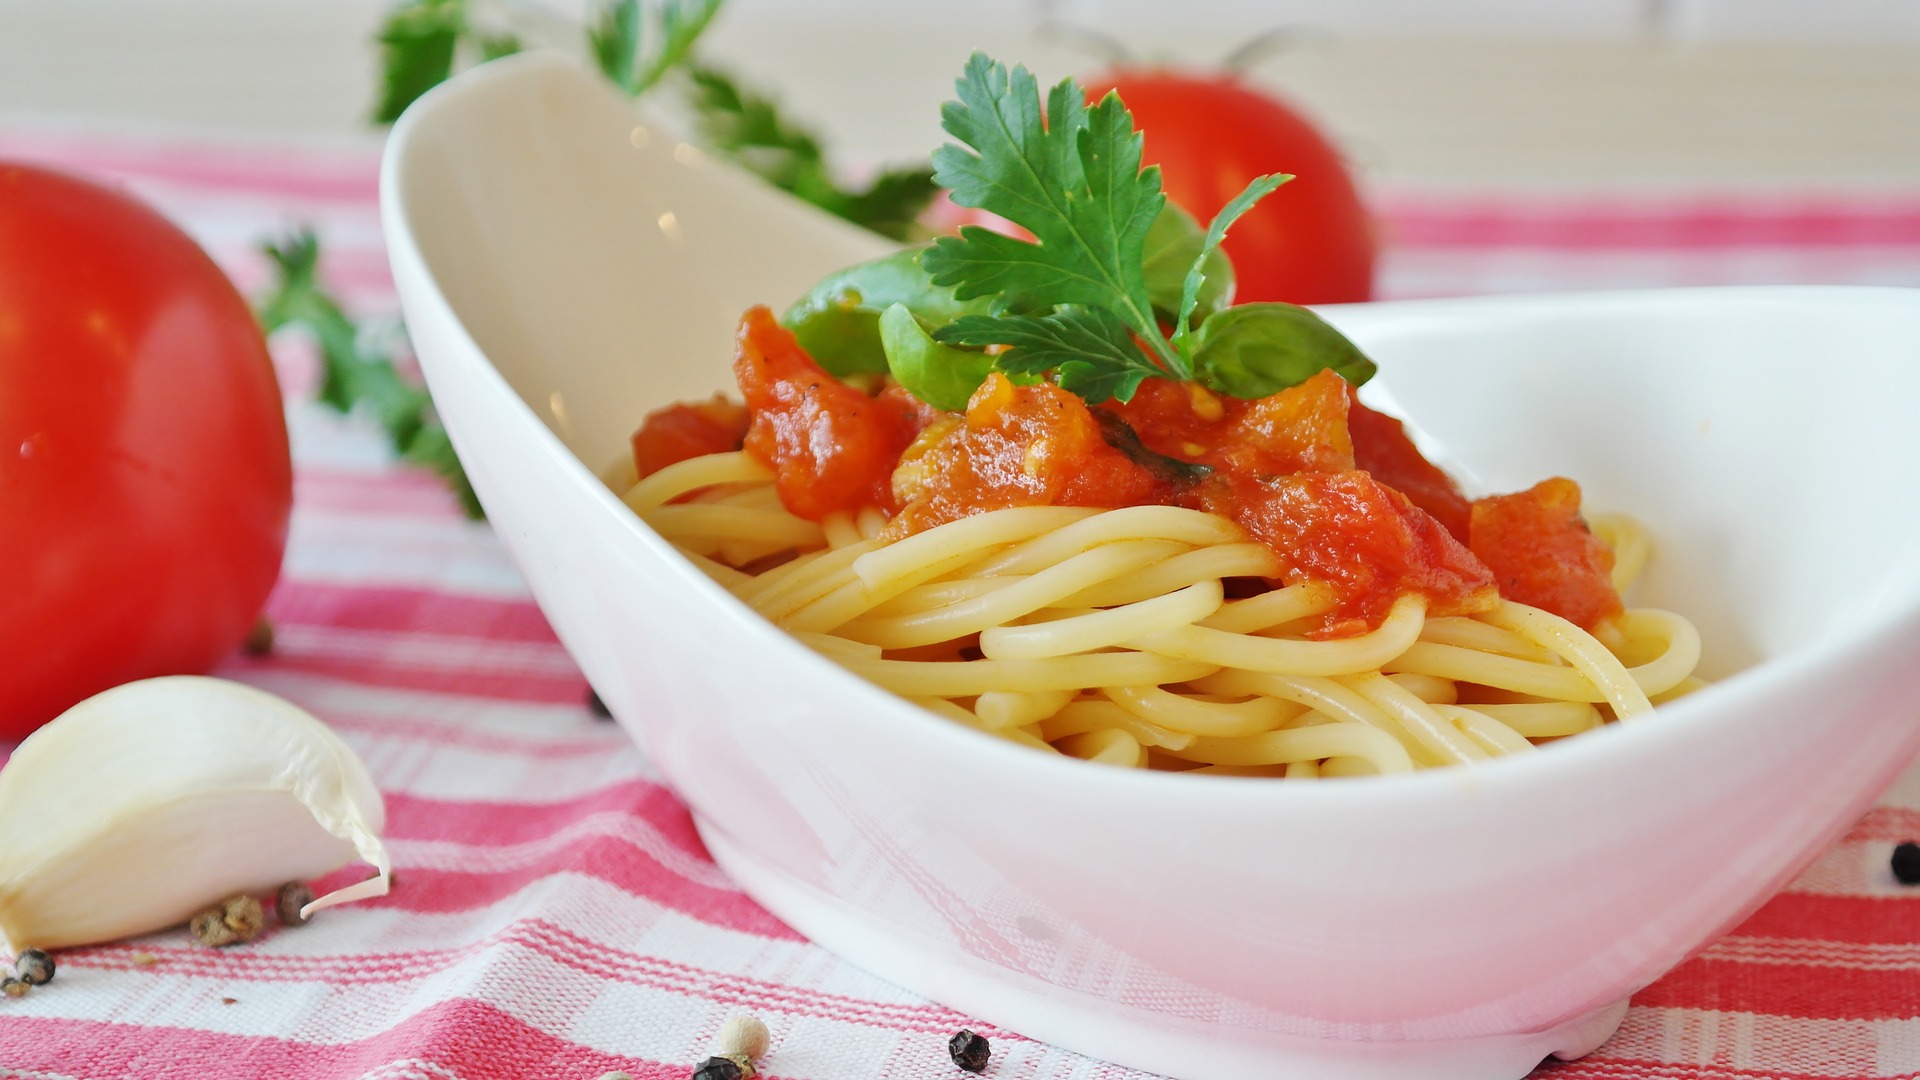
I don’t know if you see it yet, but bellow is a dish of pasta with tomato sauce and cheese.
Still don’t see it? Let’s have a closer look on the recipe.
Ingredients
The ingredients will be provided by the (product placement) PyQt5 library. Specifically we will need to provide from the QtWidgets
- 1 QApplication (table)
- 1 QWidget (serving platter)
- 1 QGridLayout (dish)
- 3 QPushButton (pasta, tomato and cheese)
and we will need the backends from matplotlib and pyplot which we will call plt for short and the yum yum numpy as np. And of course sys.
- matplotlib.pyplot or just plt (pot)
- just a tip from np (salt)
- a slice of sys (bread)
Bellow, you can see a picture of those ingredients.
from PyQt5.QtWidgets import (QApplication, QWidget,
                             QGridLayout, QPushButton)

import numpy as np
import sys

import matplotlib
matplotlib.use('Qt5Agg')
import matplotlib.pyplot as plt
from matplotlib.backends.backend_qt5agg import FigureCanvasQTAgg as FigureCanvas
from matplotlib.backends.backend_qt5agg import NavigationToolbar2QT as NavigationToolbar0
Method
We will first cook the pasta, the basic compartment of our dish. Then, we will prepare the tomato and afterwards our cheese. We will treat all of them with a very delicate way. Finally, we have to combine all things together on our dish. We could leave things that way, but a proper chef takes care of the whole serving procedure, so we will also take care of the dish on it’s way to the table.
1 Boil water.
First, we have to boil some water. So, let’s grab some pre-boiled water from the fridge and let’s go.
self.figure = plt.figure() # figure out which pot you will use
self.canvas = FigureCanvas(self.figure) # convey water to pot
toolbar = NavigationToolbar(self.canvas, self) # navigate to hob
Just kidding. We grabbed it from the s(h)elf.
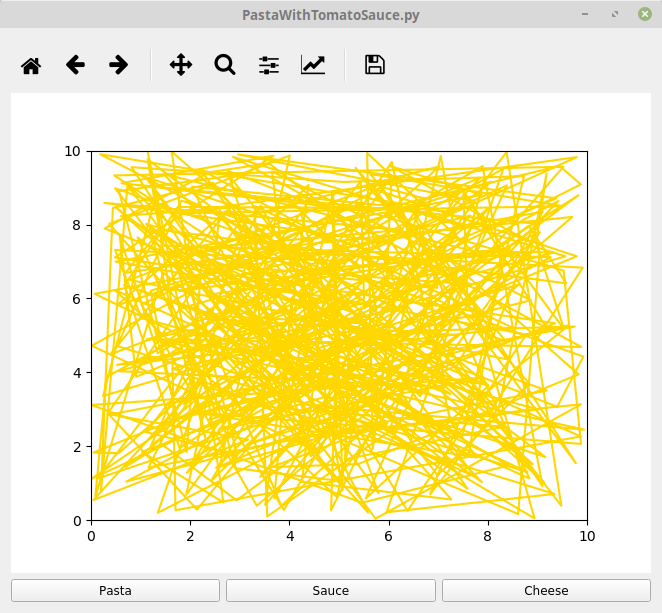
2 Get the pasta ready
Now, we will prepare the paste. Let’s choose the desired pasta, and let’s think of what we’ll do with it!
button_pasta = QPushButton('Pasta') # Choose what pasta we will use
button_pasta.clicked.connect(self.add_pasta) # think of preparation
But what is the actual preperation? Let’s have a better look at it.
def add_pasta(self):
        # prepare new pot
        self.figure.clear()

         # add a little bit of salt
        chi = np.random.uniform(0, 10, 400)
        psi = np.random.uniform(0, 10, 400)

        # get boiling water
        ax = self.figure.add_subplot(111)
        plt.axis((0, 10, 0, 10))

        # put pasta in pot and wait
        plt.plot(chi, psi, color='gold')

        # get pasta ready/dry/drawn
        self.canvas.draw()
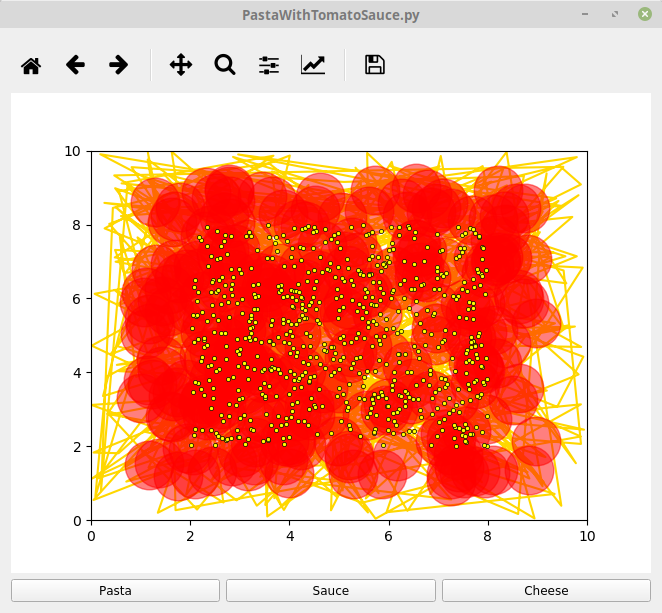
3 Get tomato sauce ready
Again, we choose the desired tomato sauce and we think about how we will incorporate to our dish.
button_sauce = QPushButton('Sauce') # choose sauce
button_sauce.clicked.connect(self.add_sauce) # think of preparation
Again, the preparation is going to be as follows:
def add_sauce(self):
    # add just a small tip of salt to the tomato sauce
    chi = np.random.uniform(1, 9, 40)
    psi = np.random.uniform(1, 9, 40)

    # heat olive oil in a pot
    ax = self.figure.add_subplot(111)
    plt.axis((0, 10, 0, 10))

    # add tomato sauce to the heated olive oil
    plt.plot(chi, psi, 'o', color='red', ms=35, alpha=0.5)

    # get sauce out of pot
    self.canvas.draw()
4 Get the cheese ready
Finally, we have to prepare the cheese. It’s should be very easy for you by now.
button_cheese = QPushButton('Cheese') # choose cheese of preference
button_cheese.clicked.connect(self.add_cheese) # think preparation
Now preparation is simpler but still is very important.
def add_cheese(self):
    # taste how salty cheese is but you can't do much about it
    chi = np.random.uniform(2, 8, 40)
    psi = np.random.uniform(2, 8, 40)

    # grab a grate
    ax = self.figure.add_subplot(111)
    plt.axis((0, 10, 0, 10))

    # grate the cheese with a specific grate size
    plt.plot(chi, psi, '.', color='yellow', mec='black', mew=0.5)

    # get cheese ready in a bowl
    self.canvas.draw()
5 Get things on dish
The last part, is the dish preparation.
# choose a nice dish
layout = QGridLayout()

# start by adding pasta, tomato sauce and cheese in that order
layout.addWidget(button_pasta, 2, 0)
layout.addWidget(button_sauce, 2, 1)
layout.addWidget(button_cheese, 2, 2)

# now hope that pasta will be hot enough
# and cheese will melt
layout.addWidget(toolbar, 0, 0, 1, 3)
layout.addWidget(self.canvas, 1, 0, 1, 3)

# smell the result
self.setLayout(layout)
6 Serve dish on the table
A proper dish is only good when you have add it to the table. So here, in this final step, let’s add this dish to our table with a slice of bread too, for any customer/friend/partner that wants to try our food!
if __name__ == '__main__':
# add a slice of bread to the table
app = QApplication(sys.argv)
# incorporate the dish recipe as we described it above
main = PastaWithTomatoSauce()
# present the dish on a serving plate
main.show()
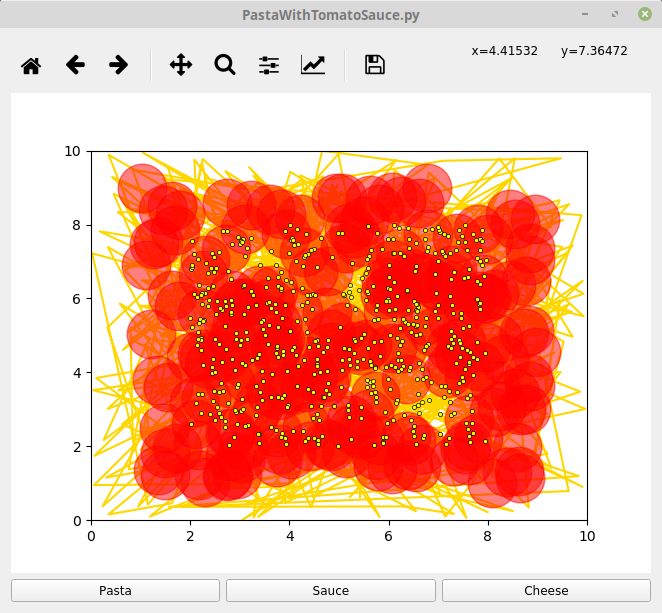
sys.exit(app.exec_())If you execute this recipe, you will get the following result.
Don’t worry, you didn’t spend 10′ for nothing, although you might see just a table. You just have to click on the buttons with the order you want to add. If you want to add more sauce or cheese feel free to click multiple times! And voila!

Bon appetite!
Here is the full recipe code.
from PyQt5.QtWidgets import (QApplication, QWidget,
                             QGridLayout, QPushButton)

import numpy as np
import sys

import matplotlib
# for full compatibility we use the specific render
matplotlib.use('Qt5Agg')
import matplotlib.pyplot as plt

from matplotlib.backends.backend_qt5agg import FigureCanvasQTAgg as FigureCanvas
from matplotlib.backends.backend_qt5agg import NavigationToolbar2QT as NavigationToolbar0


class PastaWithTomatoSauce(QWidget):

    def __init__(self, parent=None):
        super(PastaWithTomatoSauce, self).__init__(parent)

        # create figure, canvas and toolbar objects
        self.figure = plt.figure()
        self.canvas = FigureCanvas(self.figure)
        toolbar = NavigationToolbar(self.canvas, self)

        # add button objects and
        # connect the click signal to relevant functions
        button_pasta = QPushButton('Pasta')
        button_pasta.clicked.connect(self.add_pasta)
        button_sauce = QPushButton('Sauce')
        button_sauce.clicked.connect(self.add_sauce)
        button_cheese = QPushButton('Cheese')
        button_cheese.clicked.connect(self.add_cheese)

        # create the layout and add all widgets
        # on proper positions
        layout = QGridLayout()
        layout.addWidget(button_pasta, 2, 0)
        layout.addWidget(button_sauce, 2, 1)
        layout.addWidget(button_cheese, 2, 2)
        layout.addWidget(toolbar, 0, 0, 1, 3)
        layout.addWidget(self.canvas, 1, 0, 1, 3)

        # assign the layout to self, a QWidget
        self.setLayout(layout)

    def add_pasta(self):
        # clear the canvas for a new dish
        self.figure.clear()

         # generate random data
        chi = np.random.uniform(0, 10, 400)
        psi = np.random.uniform(0, 10, 400)

        # create axis with relevant lengths
        ax = self.figure.add_subplot(111)
        plt.axis((0, 10, 0, 10))

        # plot data
        # set relevant color
        plt.plot(chi, psi, color='gold')

        # update canvas with current figure
        self.canvas.draw()

    def add_sauce(self):
        # generate random data
        # tomato should be on pasta so we limit the boundaries
        chi = np.random.uniform(1, 9, 40)
        psi = np.random.uniform(1, 9, 40)

        # create axis with relevant lengths
        ax = self.figure.add_subplot(111)
        plt.axis((0, 10, 0, 10))

        # plot data
        # set relevant color, marker size, and transparency
        plt.plot(chi, psi, 'o', color='red', ms=35, alpha=0.5)

        # update canvas with current figure
        self.canvas.draw()

    def add_cheese(self):
        # generate random data
        # cheese should be on tomato so we limit the boundaries
        chi = np.random.uniform(2, 8, 40)
        psi = np.random.uniform(2, 8, 40)

        # create axis with relevant lengths
        ax = self.figure.add_subplot(111)
        plt.axis((0, 10, 0, 10))

        # plot data
        # set relevant color, marker edge color, and width
        plt.plot(chi, psi, '.', c='yellow', mec='black', mew=0.5)

        # update canvas with current figure
        self.canvas.draw()


if __name__ == '__main__':
    app = QApplication(sys.argv)

    main = PastaWithTomatoSauce()
    main.show()

    sys.exit(app.exec_())
I am a Greek master's degree student of biomedical data science. I am going to spend the summer doing a visualization project in Ljubljana, Slovenia.

Leave a Reply