Teaching a Pi to Talk
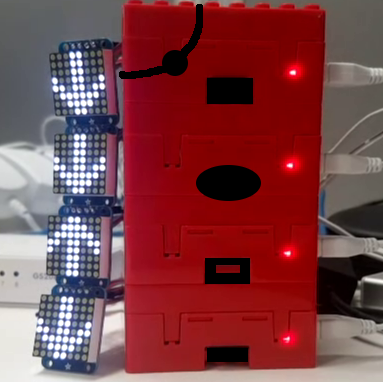
So, I’m sure you’re wondering what the above video shows. It’s the product of my first week of work here in Ediburgh, and is called a “Wee Archlet”. It is called this because it is a cluster of Raspberry Pis, much like Wee Archie, but smaller. Can they actually talk? Yes, but only to each other, and only if they use a system called MPI (Message Passing Interface). The arrows shown tell us when a Pi is sending or receiving a message from another Pi. Here, they do so in a “ring”, which I’ll explain below. I’ll also explain how I built this, how the animations are shown, why it’s useful, and share some nice photos of Edinburgh!
Building a “Wee Archlet”
The first task I was given when I arrived in EPCC was to build an Archlet, so I understood exactly how Wee Archie was put together. Setting up a Raspberry Pi is much like setting up any Linux computer – you can do it graphically, or over the network – I won’t go into that. The interesting parts of the configuration are how they share information, and how they show it.
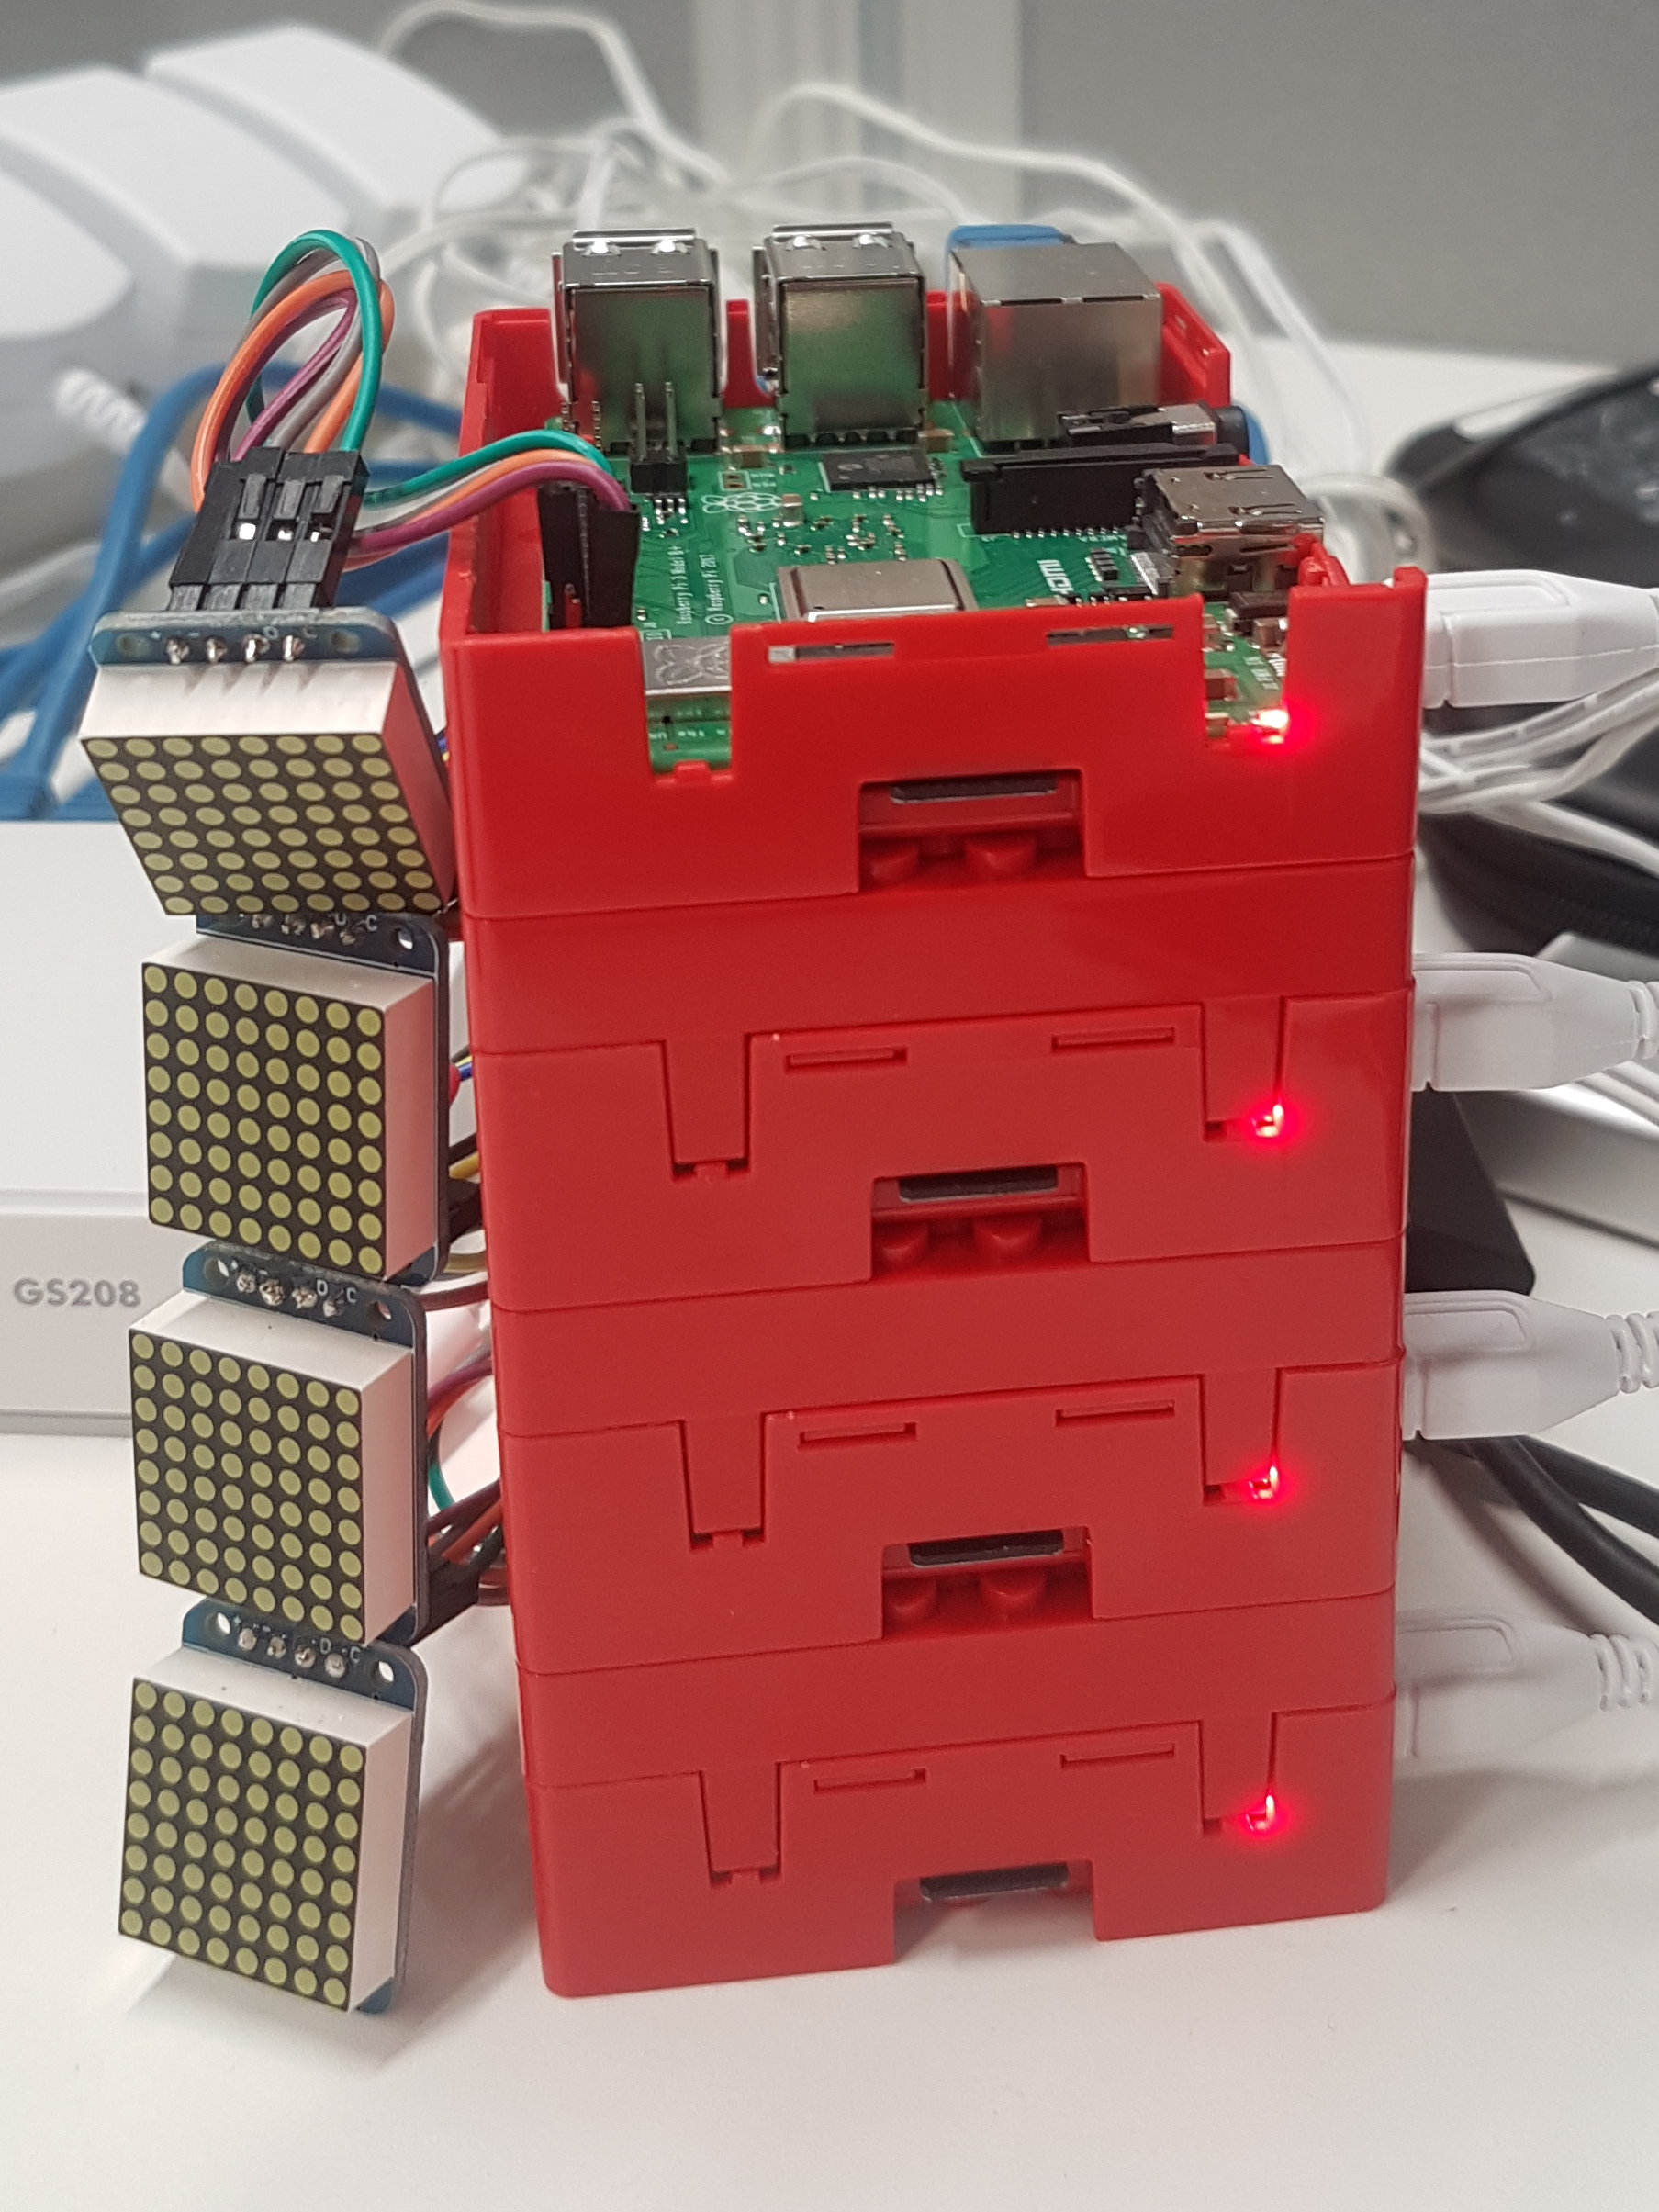
Setting up MPI on a Raspberry Pi is fairly easy, and allows machines to start talking as soon as you have them on one network, and they all know where to find each other. You can see below the small “Ethernet switch” I use to connect them all to a local network. An interesting aspect of the setup that is very convenient is a shared drive. Raspberry Pis all have their own SD cards to store files on but it’s possible with Raspian (the operating system they run) to share a drive over the network. This means they can all have access to the same storage space as fast as the network allows, and means you can easily share data, programs, and output between Pis.
EPCC have a very good guide on how to build your own, if you’re curious about more details!
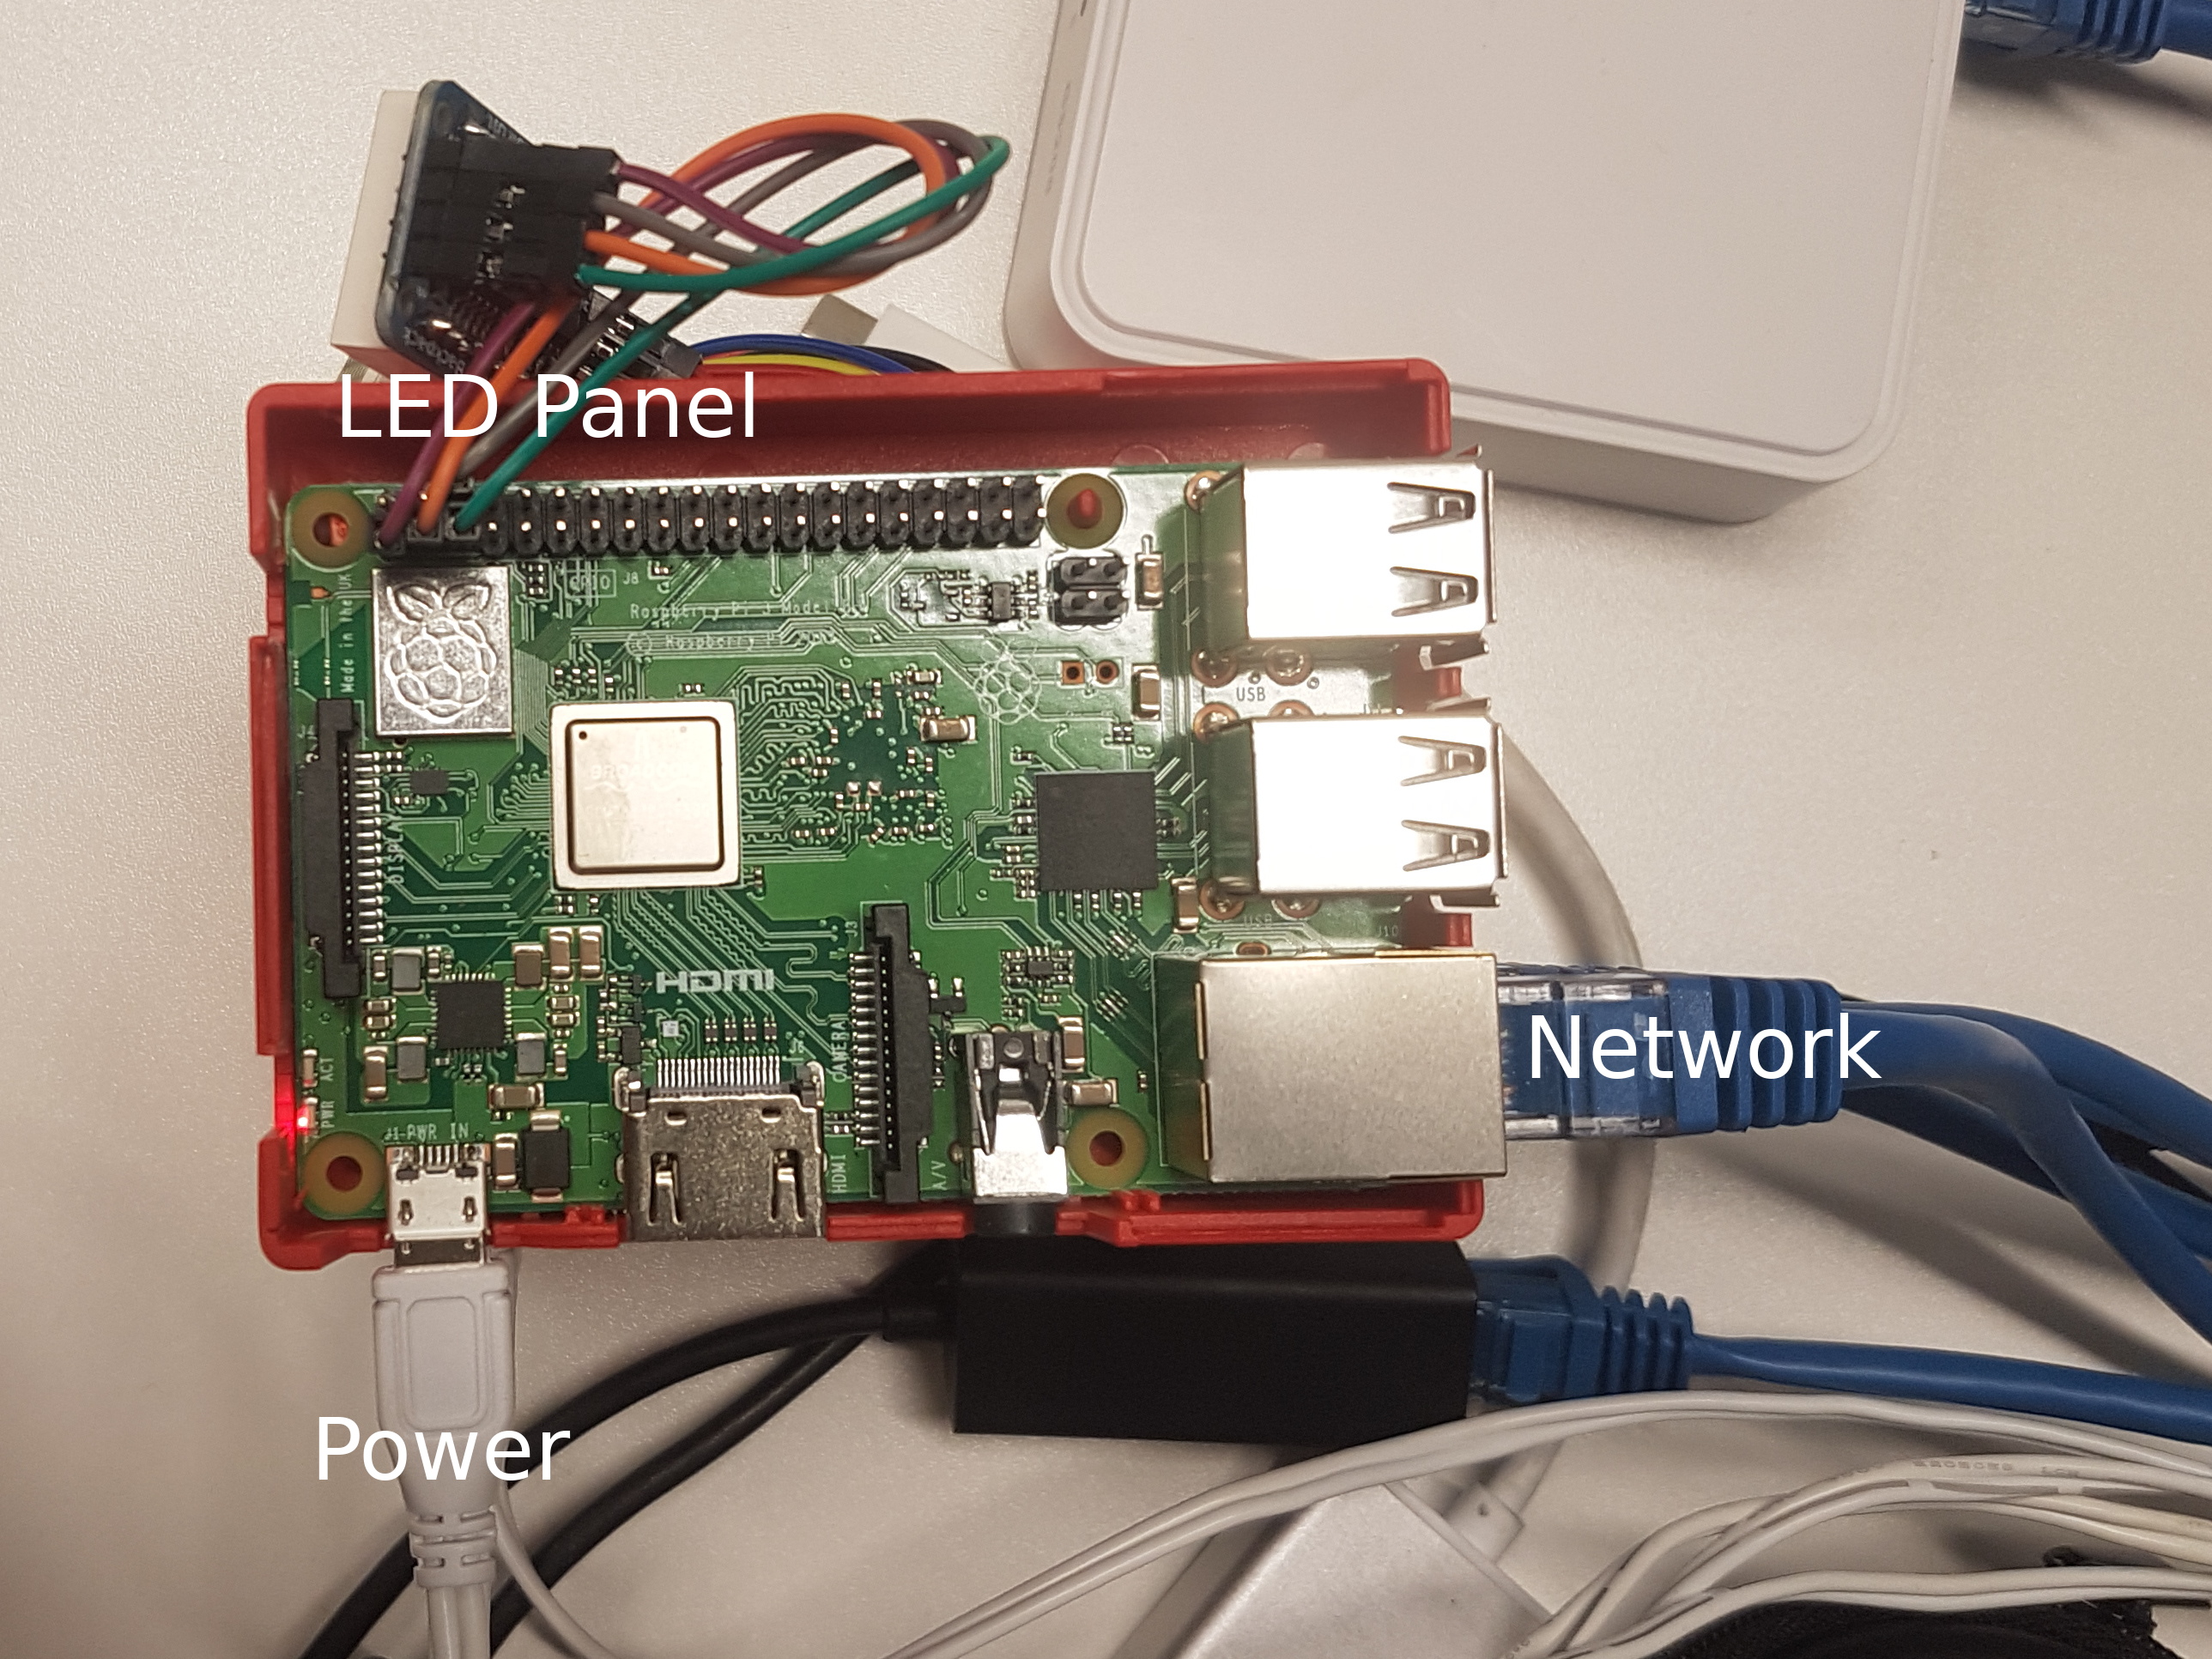
A Single Raspberry Pi 
Router Setup
The Animation Server
Running MPI code on the Archlet is as easy as running it on any other cluster once it’s set up, but showing how the nodes communicate is not a typical thing to want to do. My LED panels are Adafruit LED backpacks, and while you can communicate with them in C, it’s far more pleasant to do so via Python. Adafruit provide a library handling the hardware end of things, such as bus communication, which you can find here. Then I can just talk to the Python script from C, making it as simple as calling a slightly modified MPI function!
With this Python library, I can do simple things, such as this idle animation, by saving the animation as a sequence of 8×8 images of only ‘0’s and ‘1’s, then loading them each in turn and turning on the LEDs corresponding to ‘1’s and off the ones corresponding to ‘0’s. But handling the complicated types of animations necessary to show even a simple send and receive required a more complicated solution – my animation server.
On each Pi, I run a python script which starts a web server, built using Flask, a lightweight server framework for Python. Whenever this web server gets a connection with the necessary data, it will tell a seperate script (the display server) to play the correct animations. The web server will also take care of talking to the servers on the other Pi’s if it is necessary. For example, in the send and receive animations, each send has to wait for a matching receive to start and vice versa. If this isn’t clear, I’ll describe it more below.
The display server runs on a seperate process to the web server, and it will queue all the requested animations and processes up in memory, and work through their playback by converting them into single images, loading them onto the LED, and moving onto the next one.
Once it’s finalised, I’ll revisit the animation server in a later post, and go through the more complex, smaller details. For example, the display server need to be able to always receive more animations from the web server, so you have to use one of Python’s many concurrency solutions. I’m currently using processes, but that may change as need demands. I also might change the queue based display server to one that actually reads the animation from a static file on the SD card, allowing for more complicated sequences of animations, replays, etc.
Making a Ring
Just to be sure it’s clear, I’ll run through what’s happening in that first video. I’ve embedded it again here, for reference.
This is a visualisation of a simple C program using MPI, using the animation server discussed above. In the program, the bottom Pi will send a message, just the number “1”, to the one above it. Then that Pi will pass it on to the one above it, and so on. When you reach the final Pi, it will pass the message back to the first one, completing the “ring”.
This may seem useless, but imagine you need to add together numbers stored on each Pi, the results of some computation run in parallel. A simple way of doing this is this ring – add your own number, pass on the sum. When it gets back to the start, you’re done! There are more sophisticated ways of doing this, but I’ll get to them in a later post.
The C program is fairly standard among MPI demonstrations, but instead of just sending or receiving a message, it instead calls my special wee_MPI_Sendor wee_MPI_Recv methods, which first will send an HTTP request to my animation server. I do this using libcurl, a standard HTTP client library in C. Then the server processes the incoming animations as discussed above.
Goals
While this is a wonderful start, there’s still lots to do! My next goal is to make my animation server support animations for every MPI operation I think will be useful, moving beyond simple blocking sends and receives (ones which wait for a response).
I’ll flesh out the C library which communicates with the server, and then all that will be necessary to visualise the communication an existing simulation will be to use the correct functions. I hope to have a full family of simple demonstrations like the ring above that help build the animation “vocabulary” and explain basic parallel computing concepts.
The first “proper” simulation I’d like to visualise is a wave/coastline defence simulation as I mentioned in my previous post. The main issue is choosing what to visualise, as if I just showed every communication I did, as I have here, it would take hours to finish playing! I’ll break down the concepts involved and tasks necessary in a post when I get working on it. Hopefully I’ll have time to try visualising other simulations too!
Personal Update
Edinburgh is beautiful (see pictures below). Over the last two weekends, I’ve made a start on exploring the city with the other SoHPC students. Here are just a few of the locations seen, but I’ve also spent a lot of time in city’s various museums. While I can’t post photos, I would really reccommend visiting the National Museum of Scotland if you ever get the chance, it’s a wonderful collection of history, art and science. We’ve also played a great deal of the board game “Sushi Go: Party”, and visited a board game café!

Botanical Gardens 
Train Station 
Arthur’s Seat
Also, I’ve been playing a lot of Table Tennis with Benjamin Huth in my accomodation’s rec-room, and while I’m still far outstripped, I’m hopeful I’ll improve enough by the end of the summer to hold my own! More on this as it develops…
