Programming LED lights

Adafruit LED Backpack.
In my previous post I summed up what it is like to build up a Raspberry Pi based “supercomputer”. Since Raspberry Pi is a versatile device there are many more fun things one can do with it besides just running programs on it. One possibility is to connect a small LED lights panel to it to allow, for example, real-time visualisation of computations.
Hardware
All you need besides the Raspberry Pi is a LED Backpack. In my case, for the Raspberry pi cluster I was provided a set of 5 Adafruit Mini 8×8 LED Matrix Backpacks which can be connected directly to a Raspberry Pi:
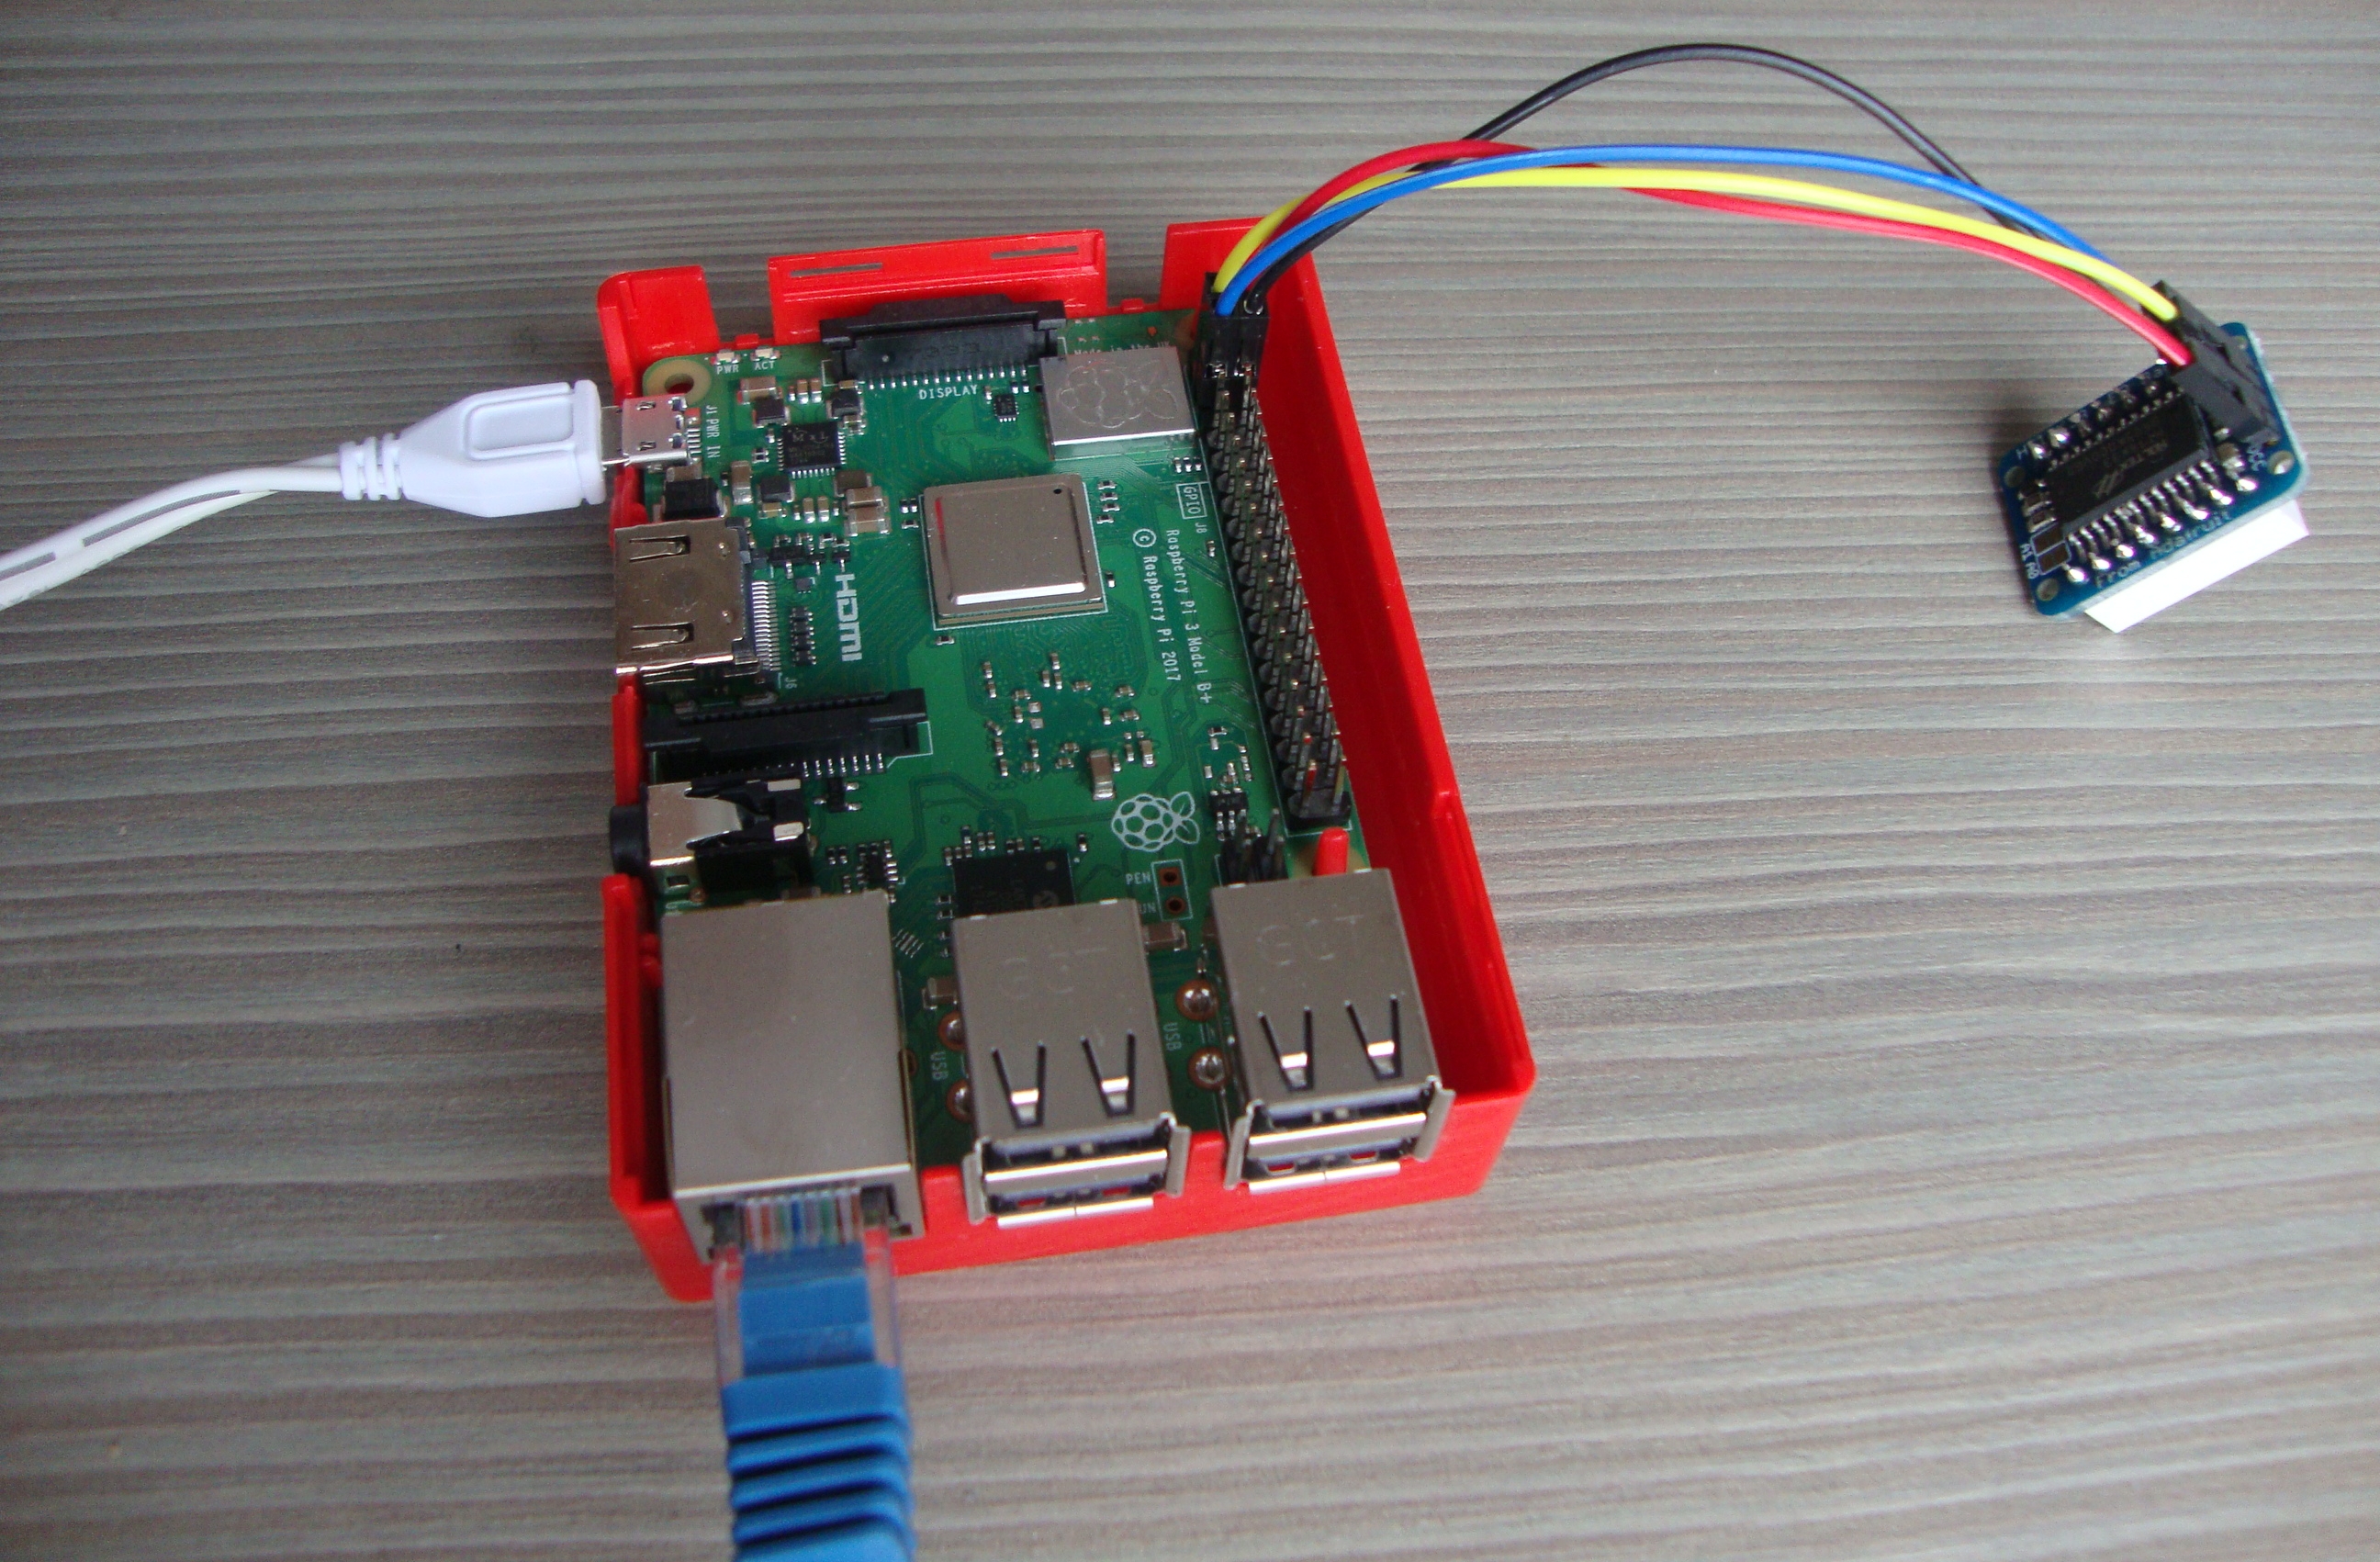
Adafruit LED Matrix Backpack connected to a Raspberry Pi.
Unfortunately, the lego cases I have for the Raspberry Pis are not quite suited for the use of LED lights, so my small supercomputer does not look that cool any more. It turned more into a random bunch of cables with different colors.

“Supercomputer” with LED lights.
Software
Programming the LED lights might sound difficult at first but it is actually quite simple. The two main pieces of software one needs are:
- Freely available Adafruit Python Led backpack library. It is a Python library for controlling LED backpack displays on Raspberry Pis and other similar devices and it provides instructions for both installation and usage.
- Python PIL (or PILLOW) library, more specifically Image and ImageDraw modules.
Programming
To avoid lengthy explaining of the mentioned libraries, lets have a look at an example straight away. The following piece of code implements one of the basic programs for LED lights which is a simple print of an image that consists of 8×8 – 1 bit pixels:
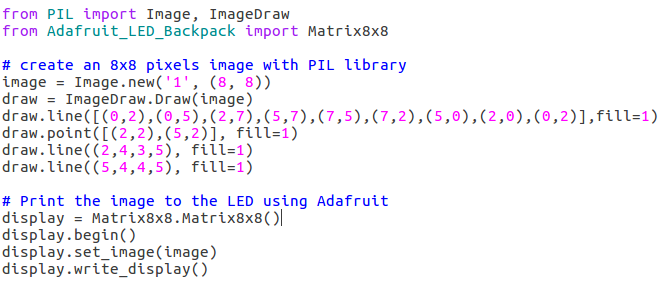
Python code.
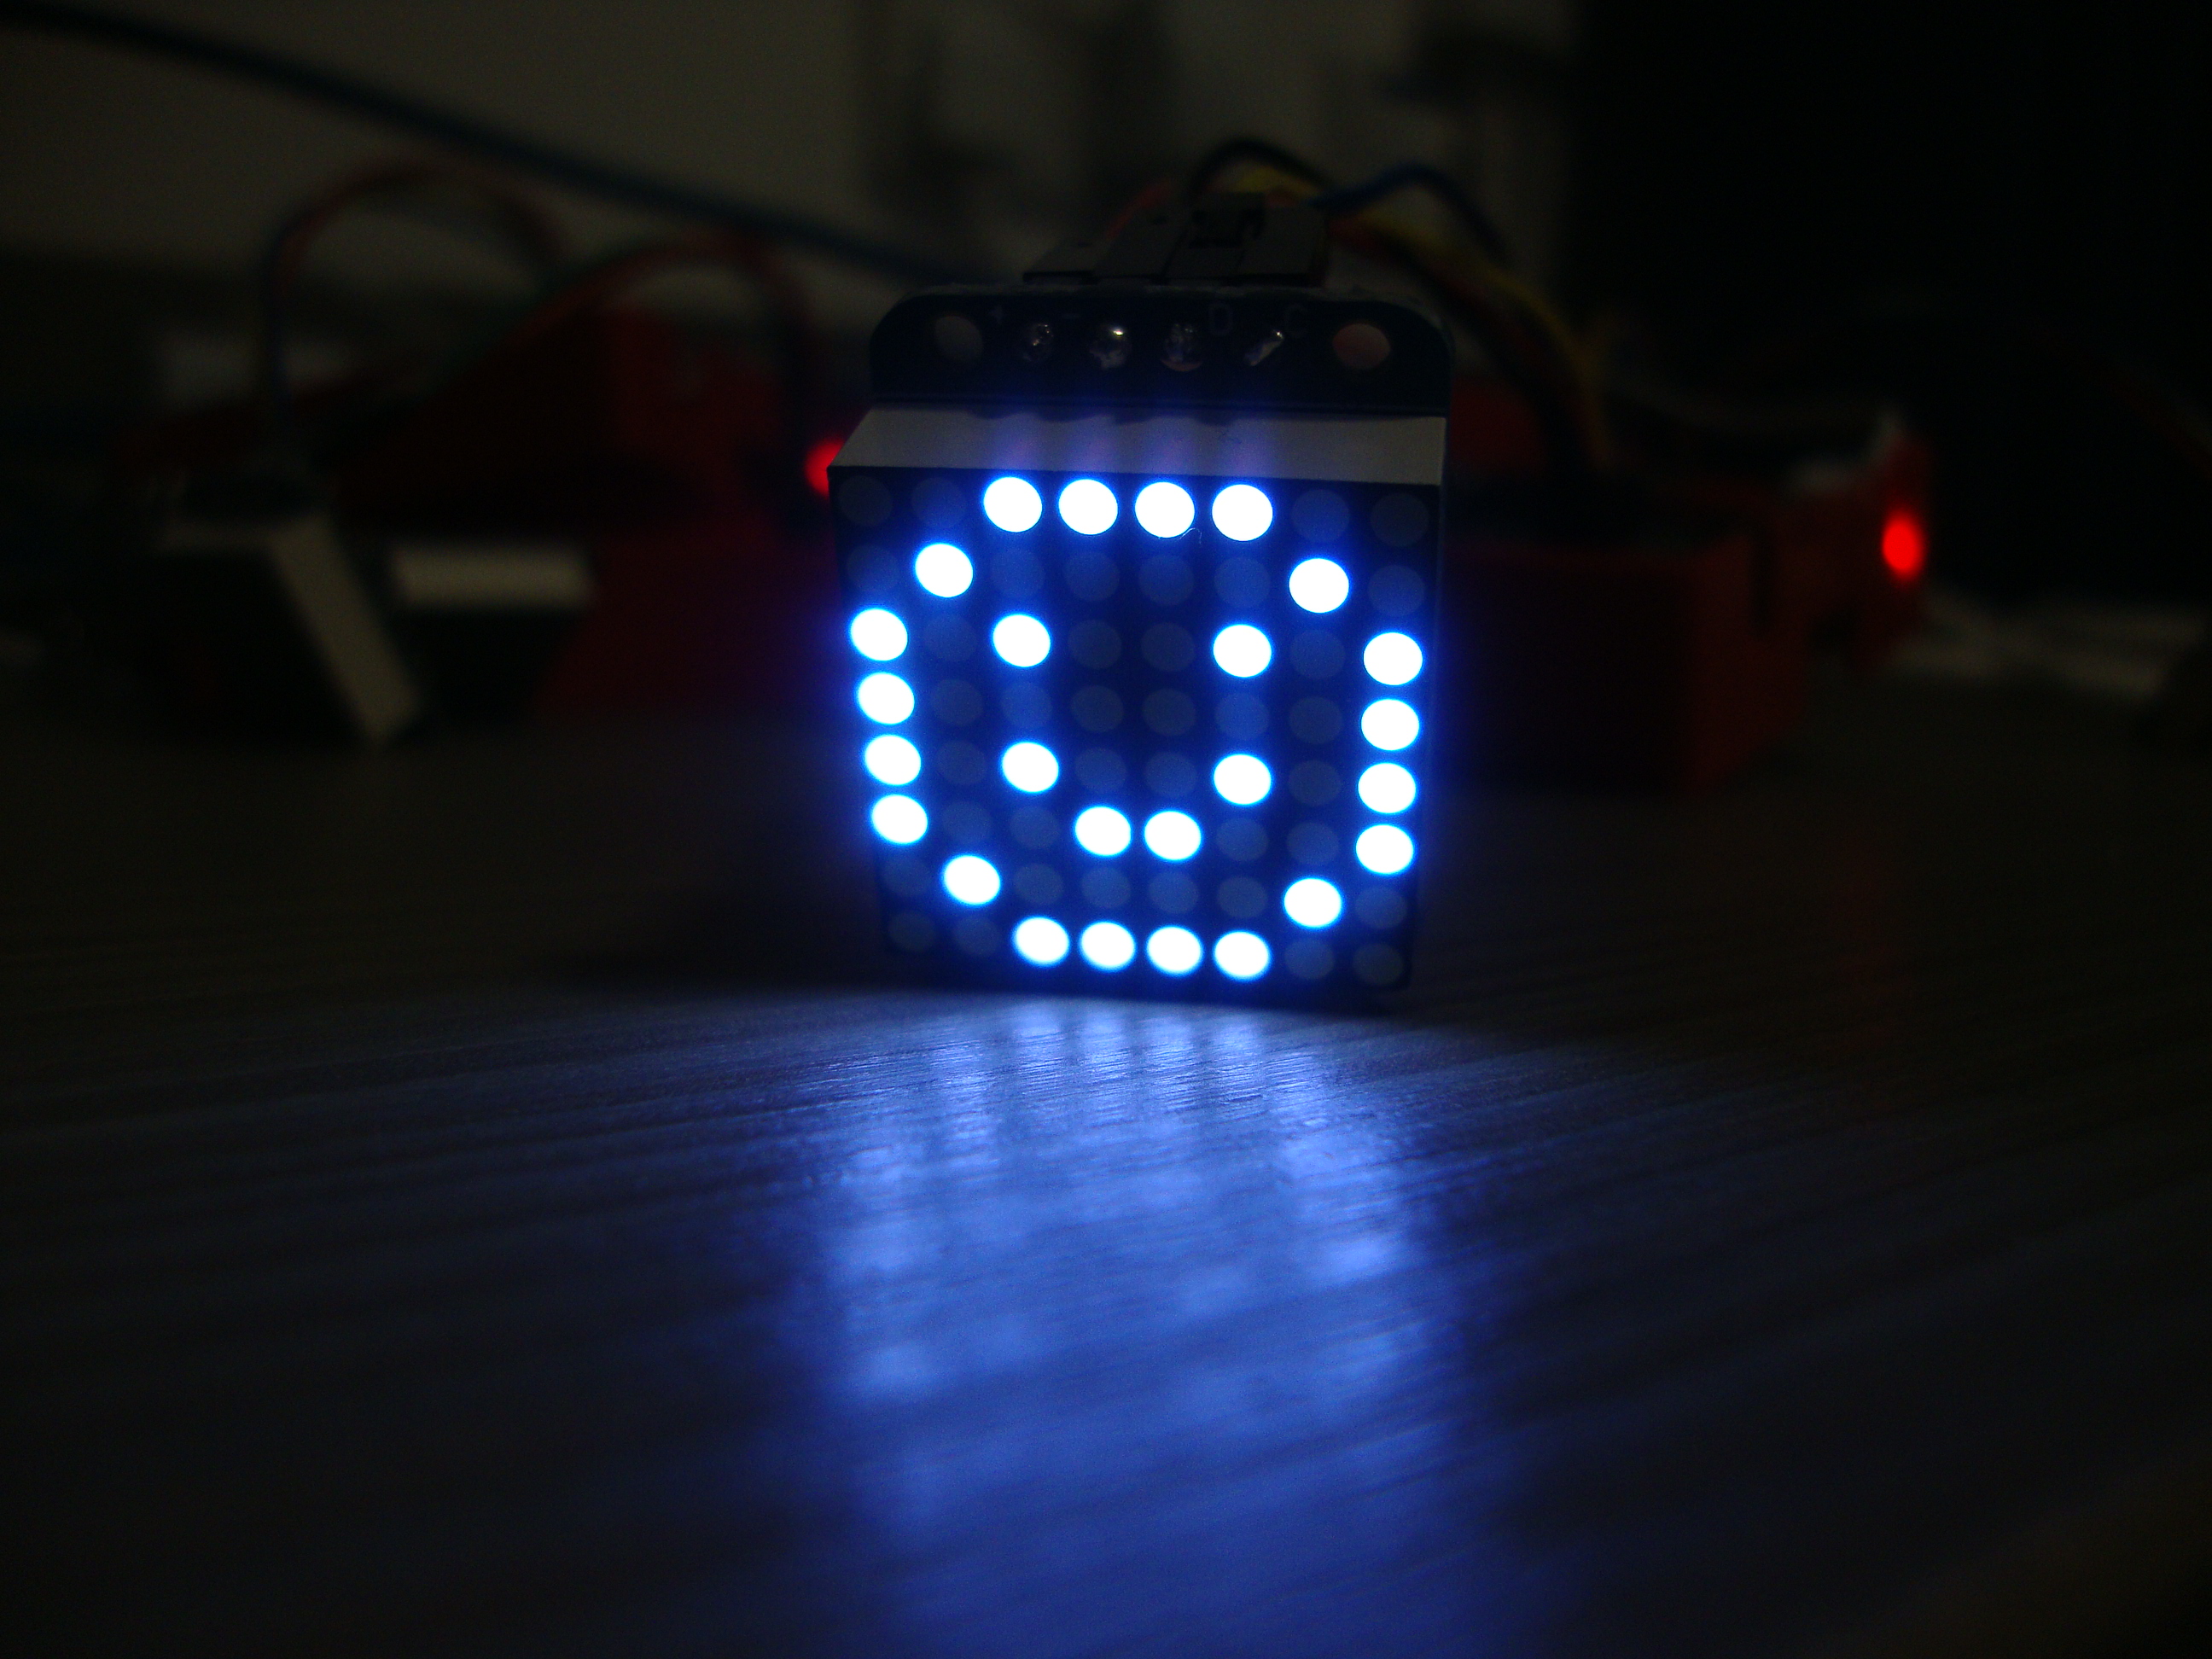
So first, with the aid of the Python PIL library, an 8×8 1 bit image is created and the desired pixels are set to nonzero values using the ImageDraw functions – draw.line and draw.point. Secondly, the LED light display is initialized and the created picture is simply printed on the LED light using the Adafruit Python library functions. As easy as it gets right? Could you guess from the code what the result will look like?
The result 🙂
The Adafruit library provides a few more simple functions such as:
- function that sets a chosen pixel of the 8×8 matrix directly to either on or off without the need of creating a PIL image
- horizontal scrolling function that: “Returns a list of images which appear to scroll from left to right across the input image when displayed on the LED matrix in order.”
- vertical scrolling function that works similarly to the horizontal one but the image appears to scroll from top to bottom
However, there are many other functions that one might find useful, such as rotation of an image or backwards horizontal/vertical scrolling. Even though these functions are not part of the Adafruit library one can quite easily implement them on their own.
Provided these powerful tools, all the rest is up to the users creativity. From my personal experience I would say that programming the LED lights is fun. The best part is the fact that you have a visible result and you can see it almost immediately.
Cheers,
Eva
Hello! My name is Eva and I come from the heart of Europe, the Czech Repubic. I am currently finishing my Masters degree in Numerical and Computational Mathematics at the Faculty of Mathematics and Physics, Charles University in Prague. This summer I will be working on the project Parallel Computation Demonstrations on Wee Archie as a part of the Summer of HPC program. The first time I bumped into HPC was during the first year of my Masters, just about two years ago. Parallel computations became one of the main interests of my studies and ever since then I have been trying to discover new things from this field. The biggest passion of my life besides my studies is sport. I enjoy running, swimming, hiking, skying and many other sports but most importantly I love the sport of Ultimate Frisbee. Moreover, I enjoy puzzle solving, travelling around the world and getting to know foreign cultures.
